How to Connect Components and Route Traces
Estimated reading time: 6 minutes
Placing parts is half the job; the other half is connecting them with copper. Protoboard Designer makes the connections you intend visible as thin guide lines (airwires), so you always know what's left to route. This guide explains how to declare a connection, route copper for it, switch layers with a via, and tell when you're done.
- Say what should connect (an airwire between two pads).
- Draw the copper that makes the connection real (a track).
The airwire disappears once real copper joins the pads — your built-in to-do list.
Step 1 — Declare a connection (airwire)
An airwire (also called a ratsnest line) is a thin straight line marking two pads that should be connected but aren't yet routed.
- Connect pad to pad to add an airwire between them.
- Draw the same airwire a second time to delete it — handy when you change your mind about a connection.
- It carries no copper — it's purely a guide for what to route next.
Think of every airwire as "still to do."
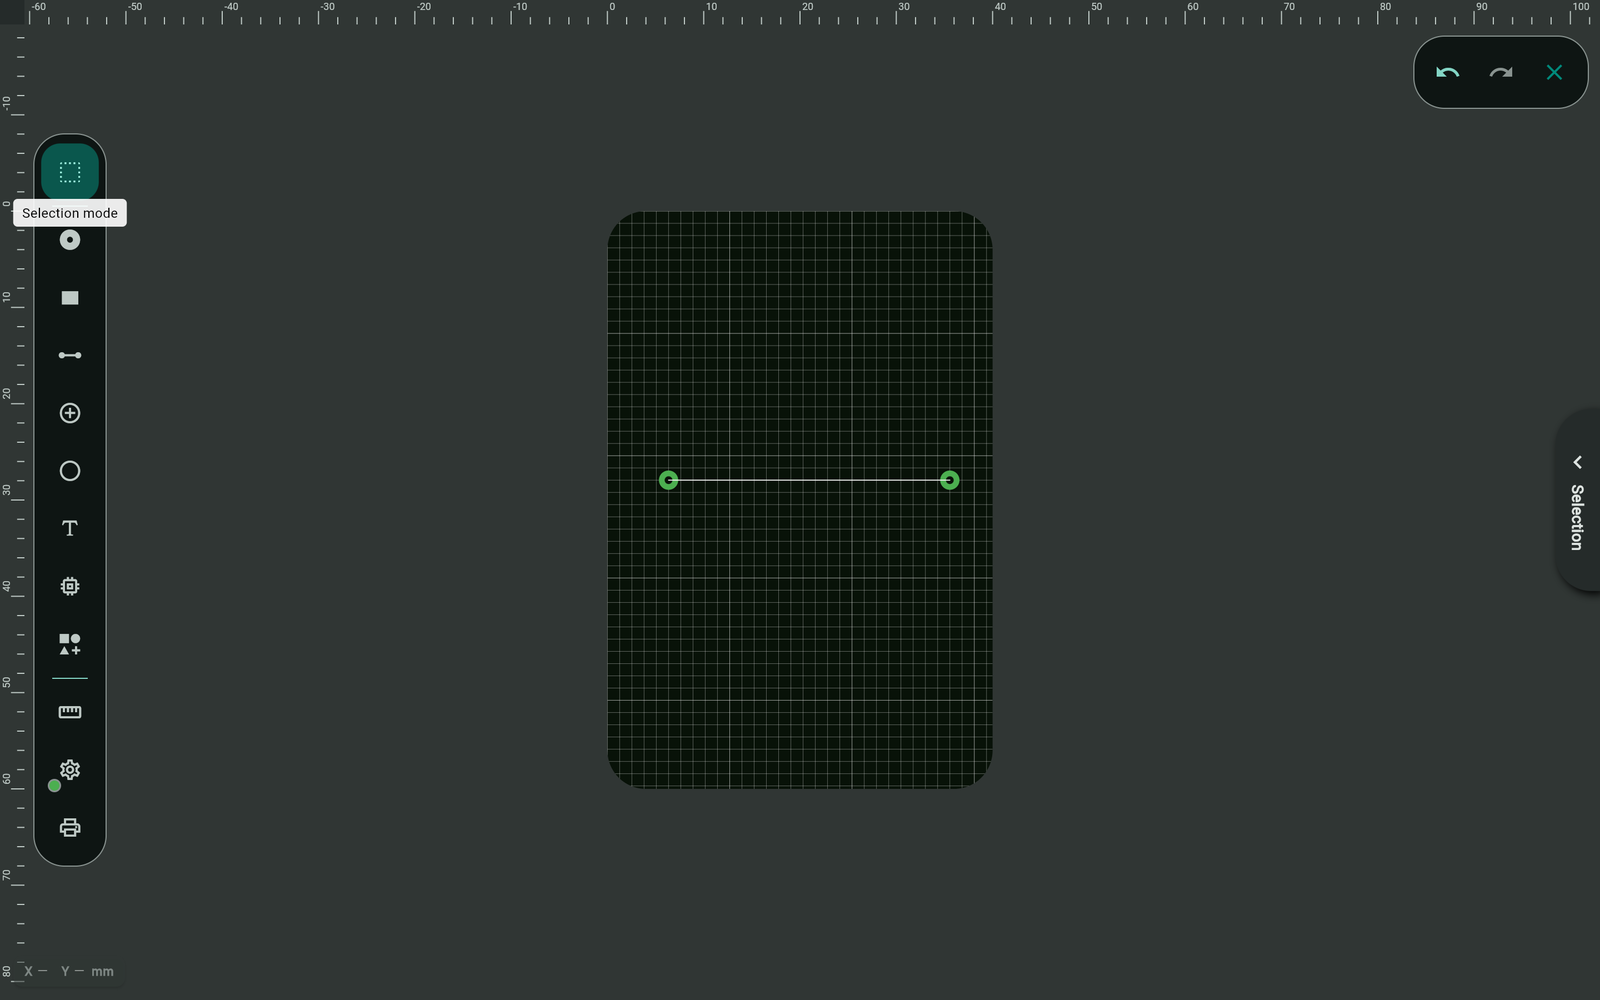
Step 2 — Route copper with the Track tool
Now lay real copper along the airwire:
- Select the Track tool from the left toolbar.
- Click the starting pad.
- Click the destination pad (add intermediate clicks to steer the trace around obstacles).
- Press Esc or switch to Selection mode when the net is done.
As soon as copper joins the two pads, the airwire for that connection clears.
Click an airwire to autoroute it — Protoboard Designer will try to draw the copper for that connection automatically. Great for simple nets; tidy up by hand where it matters.
Autoroute everything at once
When you have a lot of airwires, Autoroute All (in the Track tool's property panel) attempts to route them in one batch. A scope setting controls which airwires it tackles, so you can route in sensible passes instead of all-or-nothing:
| Scope | Routes… |
|---|---|
| All | Every airwire on the board (the default). |
| Selected | Only the airwires currently selected on the canvas. |
| Top side | Nets the router would place on the top copper. |
| Bottom side | Nets the router would place on the bottom copper. |
| Through-hole | Nets where at least one end is a through-hole pad. |
| SMD only | Nets where neither end is a through-hole pad. |
A progress dialog shows how it's going, and you can Cancel part-way. Autoroute is a starting point, not the last word — review the result and hand-route the connections that matter (power, ground, sensitive signals).
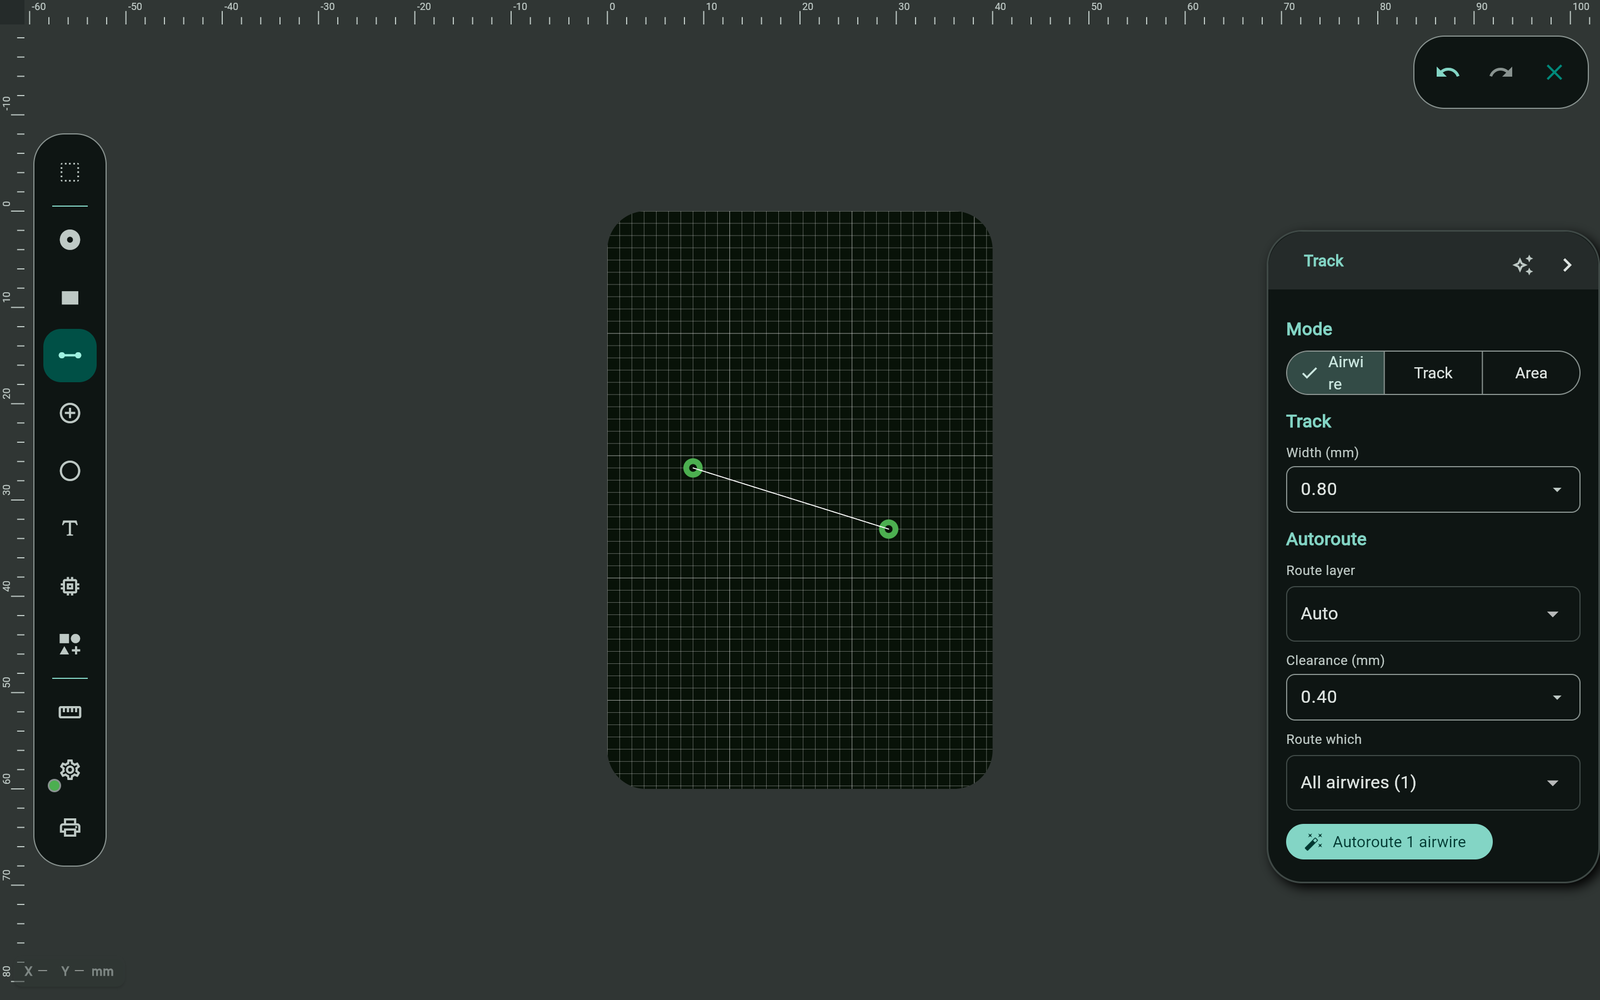
Drag a track end onto a pad (or a pad onto a track end) to lock them together. After that, moving the pad brings the connected track along. You can unlock the connection if you'd rather move them separately.
Switch layers with a via
When two traces need to cross, send one to the other copper layer instead of letting them touch:
- Route up to the crossing point.
- Place a via to jump to the opposite layer (e.g. Copper Top → Copper Bottom).
- Continue routing on that layer, around the obstacle.
On a two-layer board this is the everyday trick that keeps a busy layout from tangling. See Understanding PCB Layers.
Know when you're done
- No airwires left = every intended connection is routed.
- Use the Net Probe tool to see counts (pads, tracks) and check connectivity if something looks off.
- Make power and ground traces wider than signals — see Choosing Trace Width & Spacing.
Troubleshooting
The airwire won't go away after I route a trace
The copper probably isn't actually touching both pads. Zoom in and make sure each track end lands on the pad (drag the end onto the pad so it locks). A trace that stops just short doesn't complete the connection.
Moving a pad drags a trace I didn't want to move
The track is locked to that pad. Unlock the connection if you want to move them independently, or move them together on purpose.
Two traces have to cross
They can't share a layer. Drop a via and run one trace on the other copper layer past the crossing point.